啊临近开学了好烦啊…(卧槽输入这段字的时候忽然接到通知说推迟一天开学…啊啊啊啊啊啊车票又取出来了不能改签,又少玩一天了呜呜呜呜┭┮﹏┭┮
前言
最近在闲逛的时候发现了一个好玩的项目
cloudreve / Cloudreve:🌩支持整合云存储的云盘系统(一个项目可在几分钟内帮助您构建自己的云)
看了看手上闲置的 OneDrive 和 GoogleDrive,决定在 VPS 上整一个玩玩。
部署 Cloudreve
部署没啥好说的,按照 GitHub 上说的来弄就好了
1
2
3
4
5
6
7
8
9
10
11
12
13
14
15
16
17
18
19
20
21
22
23
24
25
26
27
28
29
30
31
32
33
34
35
36
37
38
39
40
41
42
| root@pupupu:~# mkdir cloudreve
root@pupupu:~# cd cloudreve
root@pupupu:~/cloudreve# wget https://github.com/cloudreve/Cloudreve/releases/download/3.1.1/cloudreve_3.1.1_linux_amd64.tar.gz
--2020-09-01 14:12:27-- https://github.com/cloudreve/Cloudreve/releases/download/3.1.1/cloudreve_3.1.1_linux_amd64.tar.gz
Resolving github.com (github.com)... 192.30.255.112
Connecting to github.com (github.com)|192.30.255.112|:443... connected.
HTTP request sent, awaiting response... 302 Found
Location: https://github-production-release-asset-2e65be.s3.amazonaws.com/120156076/cce02c00-a44a-11ea-89db-1eaea6c481a5?X-Amz-Algorithm=AWS4-HMAC-SHA256&X-Amz-Credential=AKIAIWNJYAX4CSVEH53A%2F20200901%2Fus-east-1%2Fs3%2Faws4_request&X-Amz-Date=20200901T061227Z&X-Amz-Expires=300&X-Amz-Signature=5c8ce619e7a96d10d684cbcbb93a1df447029417d00088e82838e8de52b0d946&X-Amz-SignedHeaders=host&actor_id=0&key_id=0&repo_id=120156076&response-content-disposition=attachment%3B%20filename%3Dcloudreve_3.1.1_linux_amd64.tar.gz&response-content-type=application%2Foctet-stream [following]
--2020-09-01 14:12:27-- https://github-production-release-asset-2e65be.s3.amazonaws.com/120156076/cce02c00-a44a-11ea-89db-1eaea6c481a5?X-Amz-Algorithm=AWS4-HMAC-SHA256&X-Amz-Credential=AKIAIWNJYAX4CSVEH53A%2F20200901%2Fus-east-1%2Fs3%2Faws4_request&X-Amz-Date=20200901T061227Z&X-Amz-Expires=300&X-Amz-Signature=5c8ce619e7a96d10d684cbcbb93a1df447029417d00088e82838e8de52b0d946&X-Amz-SignedHeaders=host&actor_id=0&key_id=0&repo_id=120156076&response-content-disposition=attachment%3B%20filename%3Dcloudreve_3.1.1_linux_amd64.tar.gz&response-content-type=application%2Foctet-stream
Resolving github-production-release-asset-2e65be.s3.amazonaws.com (github-production-release-asset-2e65be.s3.amazonaws.com)... 52.216.147.43
Connecting to github-production-release-asset-2e65be.s3.amazonaws.com (github-production-release-asset-2e65be.s3.amazonaws.com)|52.216.147.43|:443... connected.
HTTP request sent, awaiting response... 200 OK
Length: 16835903 (16M) [application/octet-stream]
Saving to: ‘cloudreve_3.1.1_linux_amd64.tar.gz’
cloudreve_3.1.1_linux_amd64.t 100%[=================================================>] 16.06M 1.00MB/s in 25s
2020-09-01 14:12:52 (666 KB/s) - ‘cloudreve_3.1.1_linux_amd64.tar.gz’ saved [16835903/16835903]
root@pupupu:~/cloudreve# tar -zxvf cloudreve_3.1.1_linux_amd64.tar.gz
cloudreve
root@pupupu:~/cloudreve# chmod +x ./cloudreve
root@pupupu:~/cloudreve# ./cloudreve
___ _ _
/ __\ | ___ _ _ __| |_ __ _____ _____
/ / | |/ _ \| | | |/ _ | '__/ _ \ \ / / _ \
/ /___| | (_) | |_| | (_| | | | __/\ V / __/
\____/|_|\___/ \__,_|\__,_|_| \___| \_/ \___|
V3.1.1 Commit #27bf8ca Pro=false
================================================
[Info] 2020-09-01 14:15:38 初始化数据库连接
[Info] 2020-09-01 14:15:38 开始进行数据库初始化...
[Info] 2020-09-01 14:15:39 初始管理员账号:admin@cloudreve.org
[Info] 2020-09-01 14:15:39 初始管理员密码:[数据删除]
[Info] 2020-09-01 14:15:41 数据库初始化结束
[Info] 2020-09-01 14:15:41 初始化任务队列,WorkerNum = 10
[Info] 2020-09-01 14:15:41 初始化定时任务...
[Info] 2020-09-01 14:15:41 当前运行模式:Master
[Info] 2020-09-01 14:15:41 开始监听 :5212
|
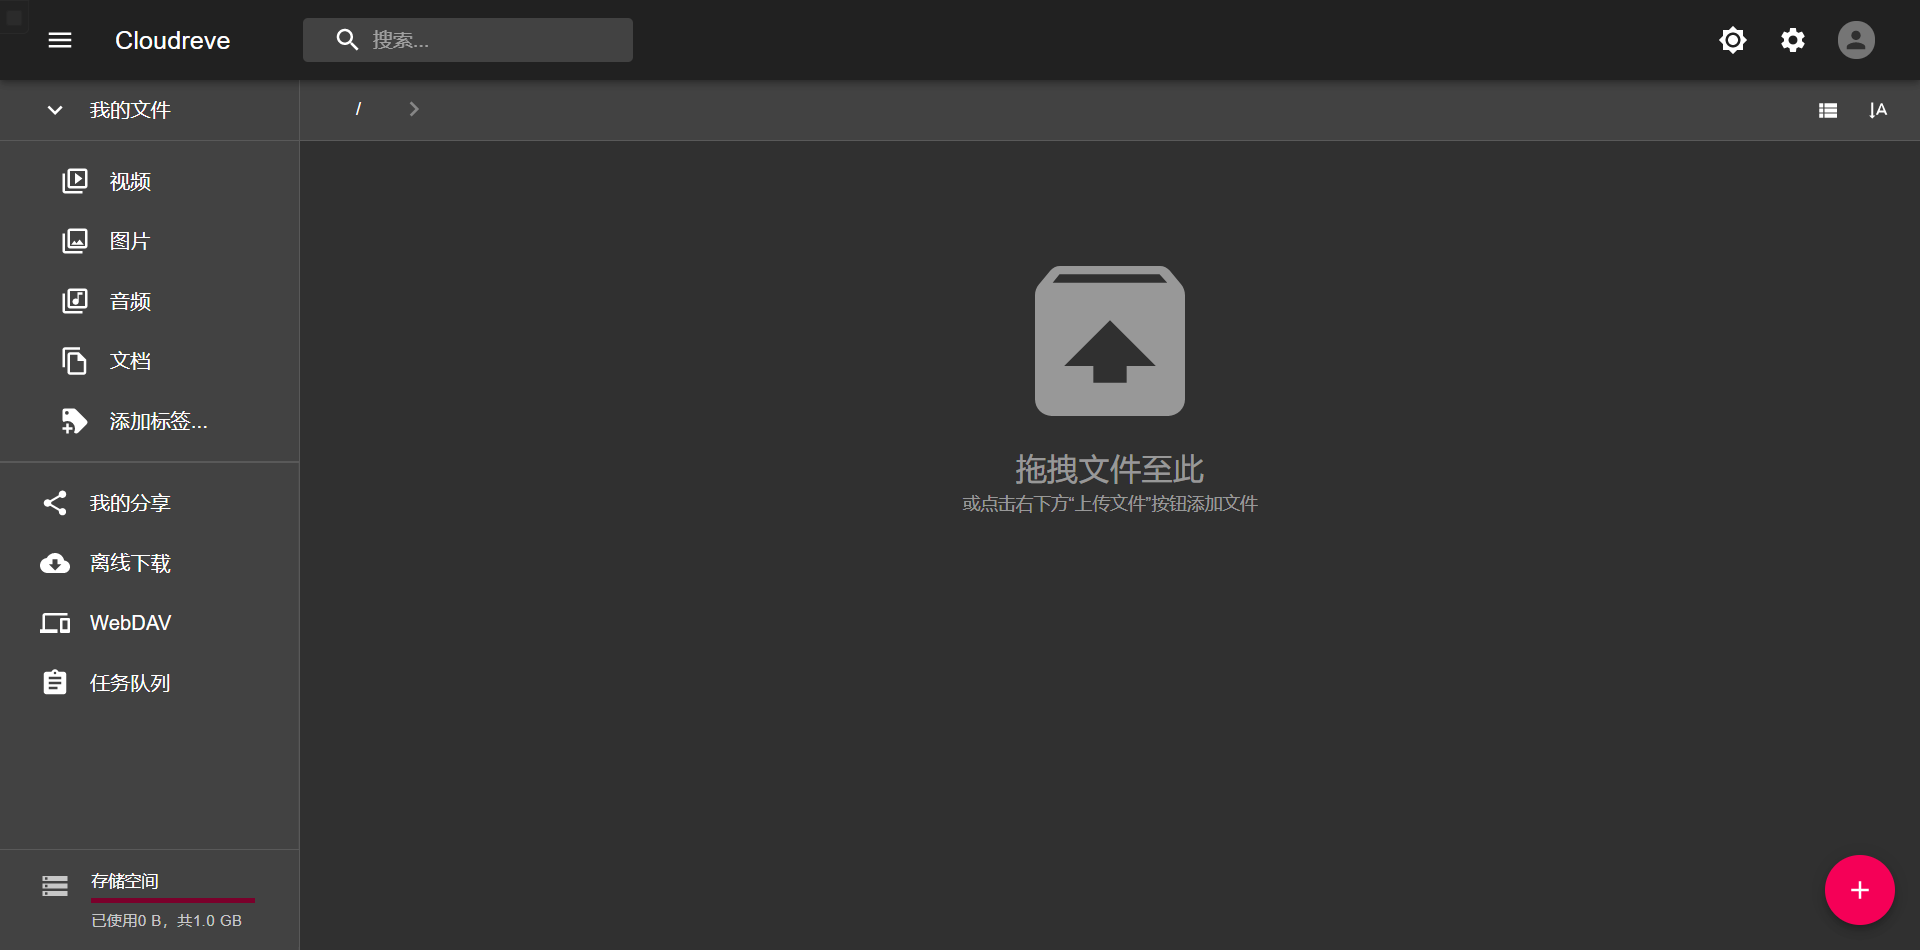
至此 cloudreve 算是安装好了,接下来访问[你的域名/IP]:5212进入你的私人网盘
![image-20200901142717392]()
初步配置
按照上面的方式部署的其实是一个非常简陋的服务,是一个没有 SSL 甚至在退出当前 SSH 会话后就会消失的存在。下面会利用之前安装到的 Caddy 为其自动配置 SSL 证书并且绑定一个域名。同时弄下进程守护,让其能持续运行。
Caddy 的配置
Caddy 的安装略过,不会的可以参考我之前写的一篇文章:从零搭建 Hexo:另类的 Hexo+Caddy 自动发布方案
为了方便区分域名的功能,这里我给服务器绑定了一个新的域名drive.fishfish.date。
我们直接编辑文件/etc/caddy/Caddyfile,在上一个域名的配置文件下方追加内容
1
2
3
4
5
6
7
8
9
10
11
| drive.fishfish.date {
gzip
timeouts none
tls {
protocols tls1.2 tls1.3
}
header / Strict-Transport-Security "max-age=63072000"
proxy / 127.0.0.1:5212
}
|
配置进程守护
新建并编辑文件/usr/lib/systemd/system/cloudreve.service,加入以下内容(将PATH_TO_CLOUDREVE替换为程序所在目录)
1
2
3
4
5
6
7
8
9
10
11
12
13
14
15
16
17
18
| [Unit]
Description=Cloudreve
Documentation=https://docs.cloudreve.org
After=network.target
Wants=network.target
[Service]
WorkingDirectory=/PATH_TO_CLOUDREVE
ExecStart=/PATH_TO_CLOUDREVE/cloudreve
Restart=on-abnormal
RestartSec=5s
KillMode=mixed
StandardOutput=null
StandardError=syslog
[Install]
WantedBy=multi-user.target
|
保存后依次执行下述命令
1
2
3
4
5
6
7
8
|
systemctl daemon-reload
systemctl start cloudreve
systemctl enable cloudreve
|
结尾(不是
大致上一个简单的网盘就搭建好了,全程没有什么坑人的地方,一路顺畅。(难得的清爽体验)